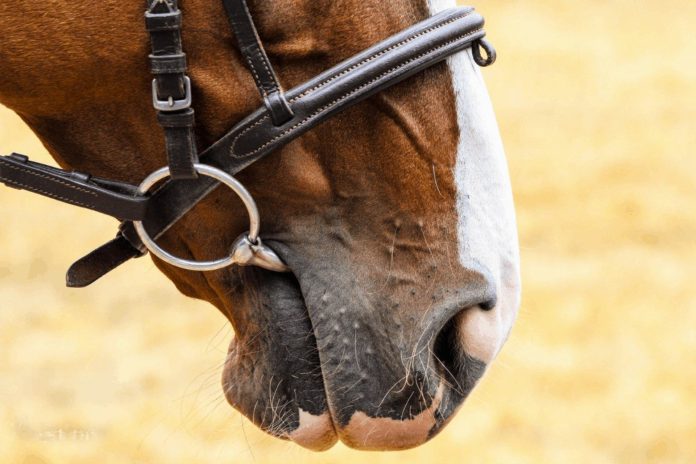
While riding a horse, the goal is to find the most agile and beautiful posture. This is “roundness” — when the horse stretches its top line longitudinally from the poll to its dock over its back in an arc. What gives us a supple and gentle connection with the horse’s mouth, jaw, and neck, known as “On the Bit”, is useful in preventing the horse from wandering off. Finding a suitable bit for your horse is important. Certified Equine Bit Fitter specialist Tammy Levasseur says: “The bit is a direct link between the rider’s hands and the horse’s sensitive mouth, yet we often rely on little more than tradition or fashion when buying one.” There are a number of things to consider while finding the best bit for your horse, which includes the class of bit (cheek piece type), mouthpiece type, and material. The action of the bit in the horse’s mouth and the feature angles within the bit and how they act on the horse’s lips, tongue, bars and poll play a key role as well.The first step in finding the suitable bit for your horse is to classify it in two different sections, class 1 and class 2. Class 1 bits have an initial angle of 90 degrees when no contact has been applied.


The rein and cheek piece of the bridle are attached to the same ring and the bit mouthpiece rotates backward (caudally) in the oral cavity of the horse with rein contact. Class 1 bits includes those with fixed cheeks such as egg butt, D-ring and full cheek snaffles, which keep the bit stable in the horse’s mouth and assist with the turning or directional aids. The loose rings in this class offer more mobility in the mouth and allow the bit to re-align during riding. The class 2 have an initial angle of approximately 0 degrees. The cheek piece of the bridle attaches to a separate ring above the ring to which the rein is attached. This produces a lever action and causes the bit to rotate forwards in the oral cavity with rein pressure. This class includes leverage bits such as a curb, Pelham, or Baucher bits. After deciding class 1 or class 2 bits for your horse, you decide on the comfortable mouthpiece. Bit maker Jim Edwards says the most Important part of a bit is the mouthpiece. Any sharp edges from either poor workmanship or the design can cause unintentional pain to the horse. The diameter of the mouthpiece influences severity. A thinner mouthpiece exerts pressure over a smaller area of the tongue and bars of the mouth, concentrating that pressure. A too-thick mouthpiece can press on the bars and tongue with no room relief. We can divide the mouthpiece into three categories: single-jointed, double-jointed, and unjointed. The mouthpiece of a single-jointed bit consists of two levers, within the joint acting as the fulcrum. This creates a “nutcracker” action with an inward force applied to the corners of the lips and pressure on the tongue. A double-jointed bit features two fulcrum points, one on each side of the tongue, reducing the inward forces applied to the lips. The middle piece can be a variety of shapes, including a “bean” or a “plate”, and is often rotated to spread the pressure on the tongue more evenly. An unjointed or Mullen bit has no lever action and places no pressure on the commissure of the lips. Force is applied to the tongue and bars only. Some bits have an inverted U shape or “port” in the middle, which puts pressure on the palatine arch (roof of the mouth).

The third step in choosing a nice bit is selecting an Equine Bit Material. Although rubber and plastic models are available, metal bits are most common. Each metal has specific properties which should be considered when selecting a bit. For example, stainless steel is not bio-available, meaning no metal is released into the horse’s mouth. With low thermal conductivity, it takes longer for a stainless steel bit to reach the internal temperature of the horse’s mouth, so it remains cold longer. So-called “sweet iron” has a bio-available oxide which gives it a taste that may encourage acceptance in some horses. After choosing the bit, the next step is correctly fitting it. You need to test whether the bit is of proper size for your horse. All you need for that is an ordinary piece of twine and a ruler or tape measure. Guide the twine into the horse’s mouth and back towards the corners so that it is positioned approximately where the bit would lie. Pull it taut and use your fingers to grasp it at each corner of the lips. Remove the twine and use your ruler to measure the length between your fingers. The general rule is that a properly fitted bit measures a quarter-inch longer than the width of the horse’s mouth. You can adjust the cheek pieces of the bridle to make sure that the bit rests properly in the bars of the mouth, creating one or two wrinkles at the corners. In addition to the width, the overall shape of a horse’s mouth, including the hard palate and the size of his tongue, can influence the size of the bit needed. This means that a thicker bit is not always milder. And, as a horse ages, the contours of the mouth may change, so the bit you use now may not be comfortable for him in 10 years. It’s easy to start second-guessing your current bit, but don’t worry: if your horse is happy and responsive, chances are it fits just fine. If you’re concerned, you can always ask your veterinarian to evaluate it. “My recommendation to anyone would be to invest in a consultation with a certified bit fitter who can come to your barn and evaluate your horse in person,” Levasseur says.


